Service Cloud Console is very useful for Customer support team, They can able to handle the knowledge, Phone, liveagent and cases in the same window.
To setup the service cloud console:
Goto setup -> Create - > Apps -> Click on New Button

Choose the Console in the list and click Next.
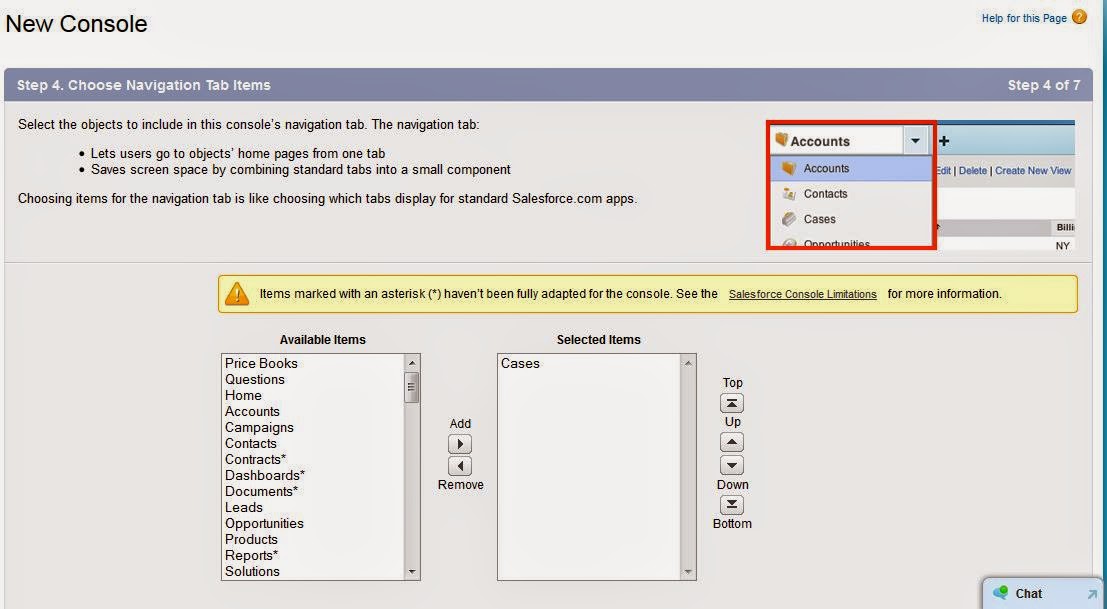
Give the Name of the console and then click next. If you want to insert the company logo you can, then click next.Choose the Navigation Tabs.
If you need any tabs, that CSS team needs to be navigate then we can selects the tabs, to display on the drop down list.
Sub- Tab
Sub-tab is used to display at the top of the record detail page. In this case, I have choose the Contact name. when you seeing the record the contact name will be displayed on the top the record like below.
Live Agent and Knowledge:
In this section, we can include the live agent and knowledge into the console. If we want to create new record during the chat,we can choose which records needs to be created.
Then is the profile visibility of the console.
Then click on save.
Now you can see the "Service Cloud Console" on the App list.
And the window will look like below.


No comments:
Post a Comment