Showing posts with label Apex class. Show all posts

Wednesday, 27 May 2015

Using the isTest(seeAllData = true) Annotation


If we set the annotation @isTest(seeAllData = true) in the test class then that class will have access to all data in the organization.

Example Class:

  1. @isTest(seeAllData = true)
  2. Public Class Test_AccountClass
  3. {
  4.                 Static testmethod void testAccountMethod1()
  5.                 {
  6.                                 Account ac = [select Name from account Limit 1];
  7.                                 System.assert(ac != null);
  8.                 }
  9.                 Static testmethod void testAccountMethod2()
  10.                 {
  11.                                 // This method will also have access to all org data.
  12.                 }
  13. }
If we are using only @isTest, then it will not have access to all org data, but it will have access to the object that are used to manage our organization.

Object used for manage Organization:

  • User
  • Profile
  • Organization
  • AsyncApexJob
  • CornTrigger
  • RecordType
  • Apex Class
  • Apex trigger
  • Apex Component
  • Apex Page

Example Class:

  1. @isTest
  2. Public Class Test_AccountClass
  3. {
  4.                 @isTest(seeAlldata = true)
  5. Static testmethod void testAccountMethod1()
  6.                 {
  7.                                 // this method will have access all the org data.
  8.                                 Account ac = [select Name from account Limit 1];
  9.                                 System.assert(ac != null);
  10.                 }
  11.                 @isTest Static testmethod void testAccountMethod2()
  12.                 {
  13.                                 // This method will have access only to the above mentioned object.eg:User
  14.                                 User u =[select Id,Name from User Limit 1];
  15.                                 System.assert(u != null);
  16.                 }
  17. }
This annotation will work for the test class saved using the salesforce API version 24.0 or latter calls. For earlier version i.e. 23.0 or earlier continues to have access to all data in the organization and its data access is unchanged.

Wednesday, 20 May 2015

With Sharing and Without Sharing


The Use of “With Sharing” and “Without Sharing” is to enforce the sharing rules.

With sharing keyword:


It allows you to specify the sharing rules for the current user be taken into the account for Apex class.  Because apex classes will always runs in system context. 

In System context Apex code has access to all objects and fields— object permissions, field-level security, sharing rules aren’t applied for the current user. 

This is to ensure that code won’t fail to run because of hidden fields or objects for a user. If a class is defined as with sharing, the method within that class will act as with sharing.

Public Class with sharing apexsharingclass
{
// sample code
}

Without Sharing:


Without sharing will ensure that the class will not enforce the sharing rules for the current user. 

Public class without sharing apexclass
{
// your code.
}

Note: 

If the method within “with sharing” class is called by a “without sharing” class, then with sharing method will execute with sharing rule enforced.

Inner classes do not inherit the sharing setting from their container class.

Classes inherit the sharing setting from a parent class when one class extends or implements another.

Tuesday, 3 February 2015

JSON Deserialize


If Rest API returns the JSON string, below is the JSON String (array of data). if you have square bracket in your JSON then it is returning the array of the data.

String jsonString = '[ {
 "FirstName" : "test",
 "LastName" : "data1",
 "Email" : "test.data1@email.com",
 "Title" : "Mr"
 },
 {
 "FirstName" : "test",
 "LastName" : "data2",
 "Email" : "test.data2@email.com",
 "Title" : "Miss"
 },
 {
 "FirstName" : "test",
 "LastName" : "data3",
 "Email" : "test.data3@email.com",
 "Title" : "Mr"
 },
 {
  "FirstName" : "test",
 "LastName" : "data4",
 "Email" : "test.data4@email.com",
 "Title" : "Miss"
 },
 {
 "FirstName" : "test",
 "LastName" : "data5",
 "Email" : "test.data5@email.com",
 "Title" : "Mr"
 } ] ';

we have to create wrapper class to get or store the values from API.

Wrapper class :
global class wrapperclass_For_API
 {
        public string Firstname{get;set;} // case sensitive we have to give the name as there in JSON.
        public string Lastname{get;set;}
        public string Email{get;set;}
        public string Title{get;set;}       
}

In Apex class the below code can be used to get the JSON without parsing.

 List<wrapperclass_For_API> rs = (List<wrapperclass_For_API>)System.JSON.deserialize(jsonString, List<wrapperclass_For_API>.class);
List<wrapperclass_For_API> wrapperlist = new List<wrapperclass_For_API>();
// If we want to get the data, we can directly get the data from rs variable like below.
for(wrapperclass_For_API s : rs)
{
       wrapperclass_For_API wfa = new wrapperclass_For_API();
       wfa.Firstname = s.Firstname;
       wfa.Lastname = s.Lastname;
       wfa.Email = s.Emaill;
       wfa.Title = s.Title;
       wrapperlist.add(wfa);
}
// after that we can access the values through wrapper list.

If JSON string is not an array, it returns only single user data based on email Id as below

string JSON_string = {
  "FirstName" : "test",
 "LastName" : "data5",
 "Email" : "test.data5@email.com",
 "Title" : "Mr"
}

   Map<String, Object> m = (Map<String, Object>) JSON.deserializeUntyped(JSON_string);
   Object First_Name = (Object) m.get('FristName'); 
   system.debug('**********'+First_Name); // it returns "test"(value of the first name) in the log.
  

Sort Map in Apex Class


Convert the map in to list, to sort the map in salesforce. Below is the example for that.

public class sortmap{

public void mapsort()

{

      map<Integer,string> sortm = new map<Integer,string>();

      List<Integer> sortlist = new List<Integer>();

      sortm.put(10,'E');

      sortm.put(89,'F');

      sortm.put(1,'T');

      sortm.put(2,'Y');

      sortm.put(90,'R');

      system.debug('----------------'+sortm);

      // To sort this map

      sortlist.addall(sortm.keyset());

      sortlist.sort();

      for(Integer i : sortlist)

      {

                  system.debug('Sorting the Map in salesforce'+sortm.get(i));

       }

}
}

Thursday, 4 December 2014

How to limit the scope in batch class

While executing the batch, you can limit the scope of the batch class.

Example:

Below is the sample batch class

Batch Class:

global class BatchClass implements  Database.Batchable<Sobject>
{
                global Database.QueryLocator start(Database.BatchableContext BC){
                }
                global void execute(Database.BatchableContext BC, List<case> scope){
                }
                global void finish(Database.BatchableContext BC){
                }
}

While calling the batch class in another class

BatchClass exter = new BatchClass();
database.executebatch(exter,1);

In the execute method , we can give the parameter to limit the scope.

Tuesday, 16 September 2014

By Pass the Validation Rule while Updating record via trigger.

  For Example I have a validation rule in Opportunity Object, that we should not leave the type Field as blank. Below is the screen shot for that.


Validation rule for above message look like below.


I want to see the error message in the UI and not on trigger. If I want to update the record via trigger, I should not  see this error message.To overcome this, sometimes we want to bypass the validation rule.

To avoid validation rule for particular profile, we can give the validation rule like below.


we want to by pass validation rule when any Profile user attempt to execute the trigger, we can follow the below steps.

1. Create a check box field in Opportunity Object, say "By Pass Validation"

2. we need to change the validation rule like below.

3.When I change the subject of task it should update the Opportunity, Task trigger will look like below. In that trigger I have updated the opportunity field "By Pass Validation".

4. We need to create the workflow, because we have made the By Pass Validation field to true, which will always skip the validation. We want the validation to skip only the trigger.


Once the workflow is activated, It will skip the validation rule for the trigger not from UI.

Monday, 23 June 2014

TEST Class for REST API Call.

Writing TEST class for REST API

If you want to have a reference for how to write REST API, please use the below link.

http://priyamohanraj.blogspot.in/2014/05/calling-rest-api-in-salesforce.html

we should first write the MOCK Class for the http Request.

MOCK REQUEST FOR TEST CLASS

@isTest
global class Mockhttpcallouts implements HttpCalloutMock {
    global HTTPResponse respond(HTTPRequest req)
    {
        system.debug('------------------'+req);
        HttpResponse res = new HttpResponse();
        System.assertEquals('GET', req.getMethod());
        res.setHeader('Content-Type', 'application/json');
        res.setBody('[{"FirstName" : "test","LastName" : "data1","Email" : "test.data1@email.com","Title" : "Mr"},{"FirstName" : "test","LastName" : "data2","Email" : "test.data2@email.com","Title" : "Miss"},{"FirstName" : "test","LastName" : "data3","Email" : "test.data3@email.com","Title" : "Mr"},{"FirstName" : "test","LastName" : "data4","Email" : "test.data4@email.com","Title" : "Miss"},{"FirstName" : "test","LastName" : "data5","Email" : "test.data5@email.com","Title" : "Mr"}]');
        system.debug('------------INSIDE IF-------------');
        res.setStatusCode(200);
         
     
}
}

Now test class for the API Class

The above call will execute whenever Account record is insert, it will trigger this API call and get the contact data and insert the contact data into salesforce.

@isTest(seeAlldata =false)
public class TestExternal_APITrg
{
   @isTest static void APIClass_Test()
   {
  Account ac = new Account();
  ac.Name = 'Test Account';
  ac.CountryName__c = 'India';
  Insert ac;
  Test.startTest();
       Test.setMock(HttpCalloutMock.class, new Mockhttpcallouts());
       try
       {
        APIClass.JSONAPICall(ac);
       }
       catch (System.CalloutException e){
System.debug('ERROR:' + e);
}
}
}

Friday, 23 May 2014

Calling REST API in salesforce

Hi

Today we can see about calling REST API in salesforce.

Step 1 :

If you want to call the REST API in salesforce, first we need to add that URL into Remote Stie Settings.

Goto setup ->Administration setup ->security Controls-> Remote site settings

Click on New
Give the name and Url in the Remote site page and click on save.

Once this URL is saved, we have to write a apex class to call this REST API. Rest API will return the JSON string, below is the JSON String. below is the array of data. if you have square bracket in your JSON then it is returning the array of the data.

String jsonString = '[ {
 "FirstName" : "test",
 "LastName" : "data1",
 "Email" : "test.data1@email.com",
 "Title" : "Mr"
 },
 {
 "FirstName" : "test",
 "LastName" : "data2",
 "Email" : "test.data2@email.com",
 "Title" : "Miss"
 },
 {
 "FirstName" : "test",
 "LastName" : "data3",
 "Email" : "test.data3@email.com",
 "Title" : "Mr"
 },
 {
  "FirstName" : "test",
 "LastName" : "data4",
 "Email" : "test.data4@email.com",
 "Title" : "Miss"
 },
 {
 "FirstName" : "test",
 "LastName" : "data5",
 "Email" : "test.data5@email.com",
 "Title" : "Mr"
 } ] ';

To get this JSON, we need to send http request, to get the data via REST API.

below is the code which is used to fetch the data frm REST API

 global class APIClass
 {
   @future(callout=true)
   public static void JSONAPICall(Account ac)
   {
  Http h = new Http();
  HttpRequest req = new HttpRequest();
  req.setMethod('GET');
  string url='                                                          ';
  req.setEndpoint(url);
  HttpResponse res = h.send(req);
  JSONParser parser = JSON.createParser(res.getBody());
  list<contact> contactsdata = new List<contact>();
        JSONParser parser = JSON.createParser(jsonstr);
        while (parser.nextToken() != null)
        {
            if (parser.getCurrentToken() == JSONToken.START_ARRAY)
            {
         
                while (parser.nextToken() !=  JSONToken.END_ARRAY)
                {
                    if (parser.getCurrentToken() == JSONToken.START_OBJECT)
                    {                    
                        contact ci = new contact();
                        while (parser.nextToken() !=  JSONToken.END_OBJECT)
                        {                        
                                if((parser.getCurrentToken() == JSONToken.FIELD_NAME) &&(parser.getText().tolowercase() == 'title'))
                                {
                                    parser.nextToken();
                                    ci.title = parser.getText();
                                }
                                if((parser.getCurrentToken() == JSONToken.FIELD_NAME) &&(parser.getText().tolowercase() == 'firstname'))
                                {
                                    parser.nextToken();
                                    ci.firstname = parser.getText();
                                }
                                if((parser.getCurrentToken() == JSONToken.FIELD_NAME) &&(parser.getText().tolowercase() == 'lastname'))
                                {
                                    parser.nextToken();
                                    ci.lastname = parser.getText();
                                }
                                if((parser.getCurrentToken() == JSONToken.FIELD_NAME) &&(parser.getText().tolowercase() == 'email'))
                                {
                                    parser.nextToken();
                                    ci.email = parser.getText();
                                }
if(ac != null)
ci.AccountId = ac.Id;
                         
                        }
                        contactsdata.add(ci);
                    }
                }
            }
        }
  if(contactsdata.size() > 0)
  {
   insert contactsdata;
  }
    }

  }

In the URL you have give your API URL, and out put of the API URL is JSON Data. After fetching the data we are inserting the data into contact object.


Thursday, 24 April 2014

Encryption in salesforce

Hi

The methods in the Crypto class provide standard algorithms for creating digests, message authentication codes, and signatures, as well as encrypting and decrypting information.
These can be used for securing content in Force.com, or for integrating with external services such as Google or Amazon WebServices (AWS).

Example code for Crypto class

public class HMacAuthCallout1 {

   public void testAlexaWSForAmazon() {
      system.debug('----Checking time-----------'+timestamp);
      String action = 'salesforce Key';
      String inputStr = action;
      String algorithmName = 'SHA1';
      Blob mac = Crypto.generateDigest(algorithmName,  Blob.valueOf(inputStr));
      system.debug('-------------'+mac);
      String md5Coded = EncodingUtil.convertToHex(mac);
      system.debug('------SHA1 Code------------'+md5Coded);     
  }
}

For more information about crypto class

http://www.salesforce.com/us/developer/docs/dbcom_apex250/Content/apex_classes_restful_crypto.htm

you can check the encrypted code in

http://sha.shadecrypt.fr/SHA1-SHA256-SHA384-SHA512/encrypt.html

Tuesday, 28 January 2014

call Javascript via Apex Class


 Visualforce Page:


escape - This attribute which allows the HTML Tags and Javascripts. if we make escape = true, the character escape sequence displays as written.


Apex Class

Below is the screen shot for classes, where will have the string variable and calling the javascript on that variable.


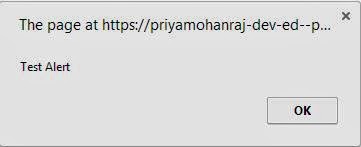
Output:

when you execute the above code, the below alert box will appear.


Thursday, 12 December 2013

Detail Page Link in Apex Class

Hi

below is the code where you get detail page link in Apex Class or trigger.

str= System.URL.getSalesforceBaseUrl().getHost();
str = str + '/'+ oldOpp.Id;
System.debug('---------System URL-----------------'+ str);

Monday, 11 November 2013

Simple REST API

Below is the steps to execute the REST Code in Salesforce.


STEP 1 : 

If you are using windows environment, we have to get the CURL to be installed in your machine.

URL to install the cURL is http://www.confusedbycode.com/curl/#downloads 


STEP 2: 

Set the Remote Access in Salesforce.

Click on setup -> create->Apps. In the Connected Apps Section click on New. 


Fill all the above details and click on save. once you have saved, you will get the consumer key and consumer secret. 


STEP 3:

Generate the Access Token to execute the RESTAPI

Go to CMD and execute the following code.

curl https://login.salesforce.com/services/oauth2/token -d "grant_type=password" -d "client_id=consumerkey" -d "client_secret=consumerSecret" -d "username=salesforceUsername" -d "password=password+securitytoken"

OUTPUT


STEP 4 : 

Create the REST API Class in Salesforce.

@RestResource(urlMapping='/Account/*')
global with sharing class MyRestResource {

    @HttpDelete
    global static void doDelete() {
        RestRequest req = RestContext.request;
        RestResponse res = RestContext.response;
        String accountId = req.requestURI.substring(req.requestURI.lastIndexOf('/')+1);
        Account account = [SELECT Id FROM Account WHERE Id = :accountId];
        delete account;
    }
  
    @HttpGet
    global static Account doGet() {
        RestRequest req = RestContext.request;
        RestResponse res = RestContext.response;
        String accountId = req.requestURI.substring(req.requestURI.lastIndexOf('/')+1);
        Account result = [SELECT Id, Name, Phone, Website FROM Account WHERE Id = :accountId];
        return result;
    }
  
  @HttpPost
    global static String doPost(String name,
        String phone, String website) {
        Account account = new Account();
        account.Name = name;
        account.phone = phone;
        account.website = website;
        insert account;
        return account.Id;
    }
}

STEP 5:

To call the do get method from a client, open a command-line window and execute the following cURL command to retrieve an account by ID:

curl -H "Authorization: Bearer sessionId" "https://instance.salesforce.com/services/apexrest/Account/accountId"

    Replace sessionId with the Access Token element that you will get that on STEP 3 as a result.
    Replace instance with your <serverUrl> element.
    Replace accountId with the ID of an account which exists in your organization.

OUTPUT:

{
"attributes":{
"type" : "Account",
"url" : "/services/data/v29.0/sobjects/Account/001XXXXXXX"
},
"Name" : "TEST DATA",
"Id": "001XXXXXXXXX"
}