For
setting up live agent, we need to have license for live agent. In Developer
Edition, we have 2 licenses.
Step 1 :
We need
to enable the Live Agent.
Now, we
can able to see the below list of setting in salesforce.
Step 2: Skills
Skills
are used to track agent’s areas of expertise and to make sure that chats are
routed to agents with the required skills.
We need
to give the name and we have to select the User, who has the correct skills and
select the User and also we can select the profile. If we want to include some
user of the particular Profile then we can use "Select User" option
and if we want to use the profile that all the user going to use live agent then
we can go profiles. Click Save button.
Step 3: Chat Buttons and Automated Invitations
we
are going to configure the chat button and automated invitations, how customer
can interact with the Live agent.
we
can configure the behavior of the live chat notification and how the request
should reach the Agent.
Second
part is the site configuration, it is not necessary unless you need to have a
pre-chat form or we need to setup the live chat button in Force.com sites. We
can take a look when we have to configure the pre-chat form. Click on save.
Once Chat
button is saved, you can see the HTML code of the button.
Step 4 : Live Agent Configuration
Here we
have 5 sections. First we can see about "Basic Configuration".
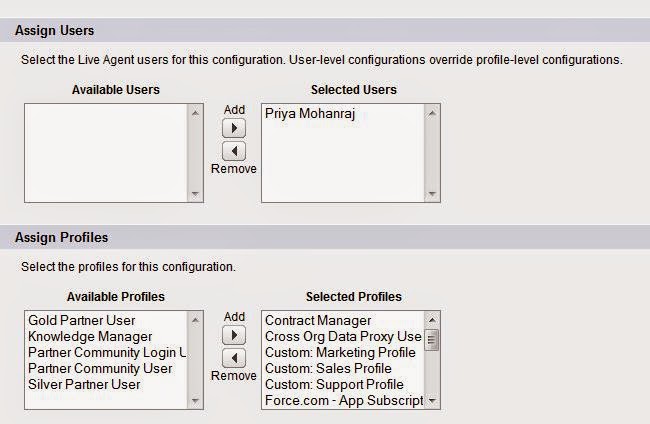
Next
section is like Assign User and Assign Profiles.
So if you
want the particular profile needs to be selected (means all the user under the
profile going to use Live agent) else we can select individual user.
Next
section is Supervisor Section
In this
section, we are going to configure the supervisor for the Agent. So supervisor
can send private message to Agent while they are in chat and also they can see
what the Agent is typing with the customer.
The Last
section is Chat Transfer.
So In
this section we can transfer the chat to another Agent. This will help the
Agents, if they are not able to answer for the particular queries.
Step 5: Live Agent Deployment
Once it is saved. It contains some HTML code.
Step 6:
Copy the HTML code from Deployment and also from chat button setting. create one Html Page and put the script into the HTML Page.
Step 7:
Enable the Live Agent License into the User.
To Make the Live Agent visible to the Agents, we have to setup Service Cloud console. For that you can see this link.
http://priyamohanraj.blogspot.in/2015/04/setup-service-cloud-console.html
http://priyamohanraj.blogspot.in/2015/04/setup-service-cloud-console.html


No comments:
Post a Comment